Friday, November 14, 2014

The Kitchen.

We've come a long way folks!  Check her out:


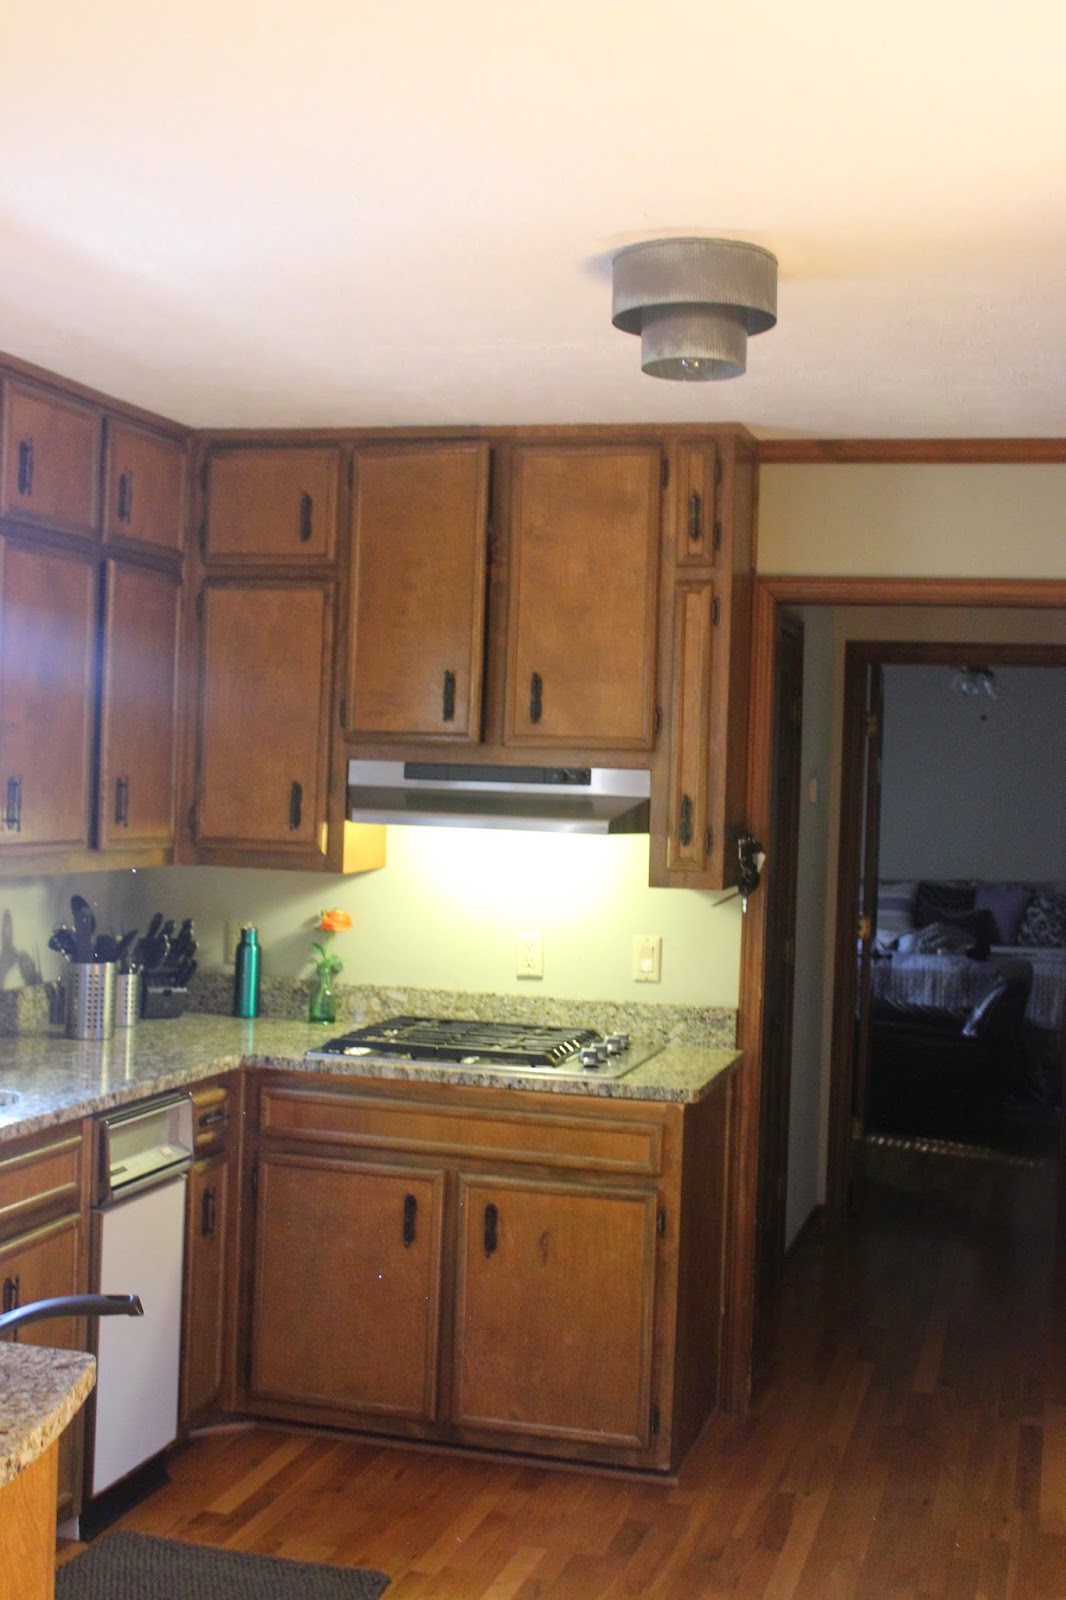
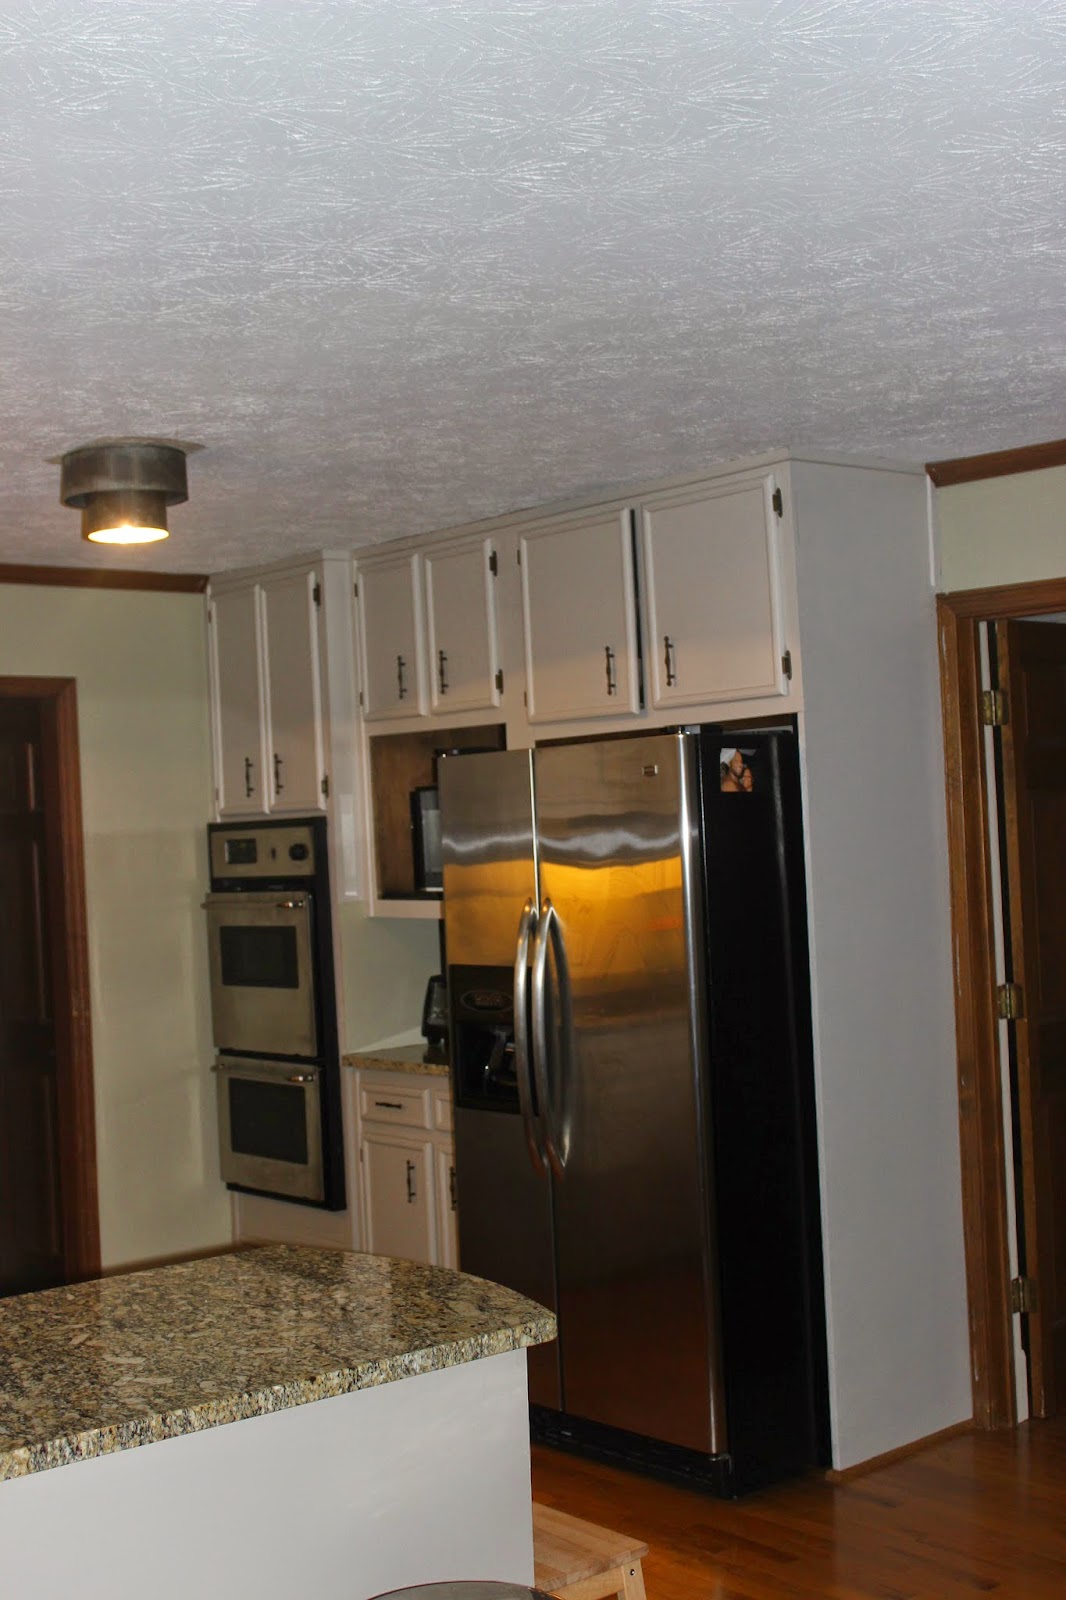
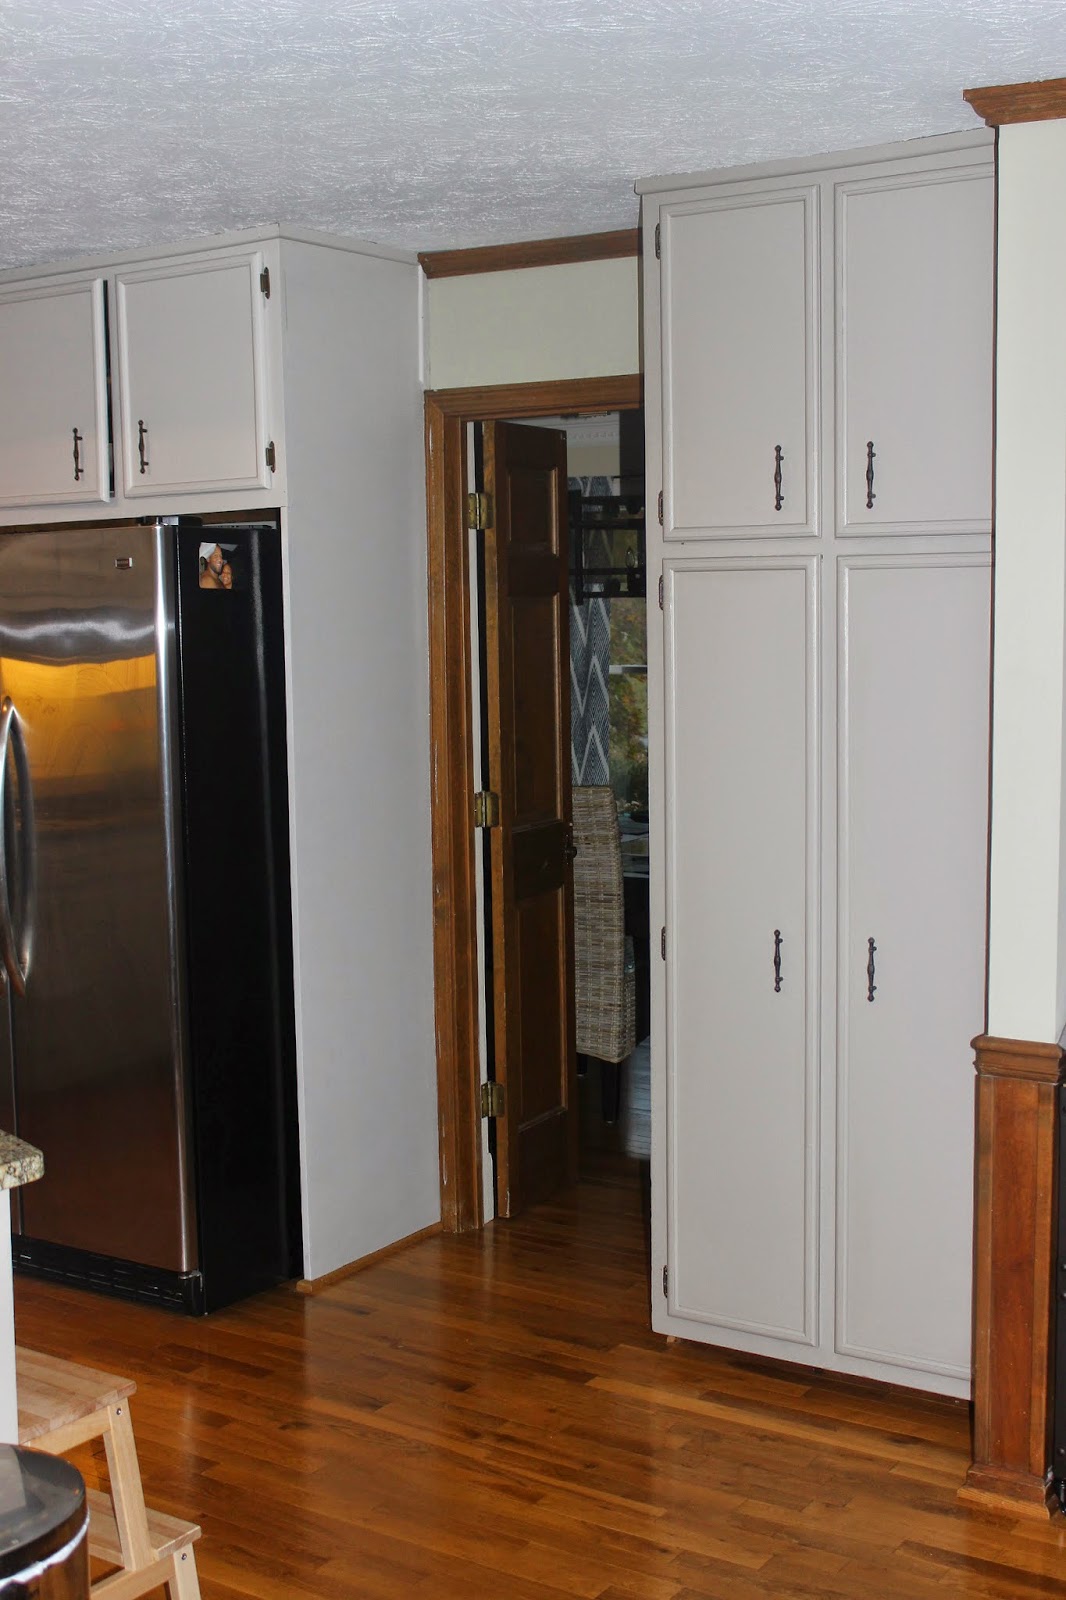
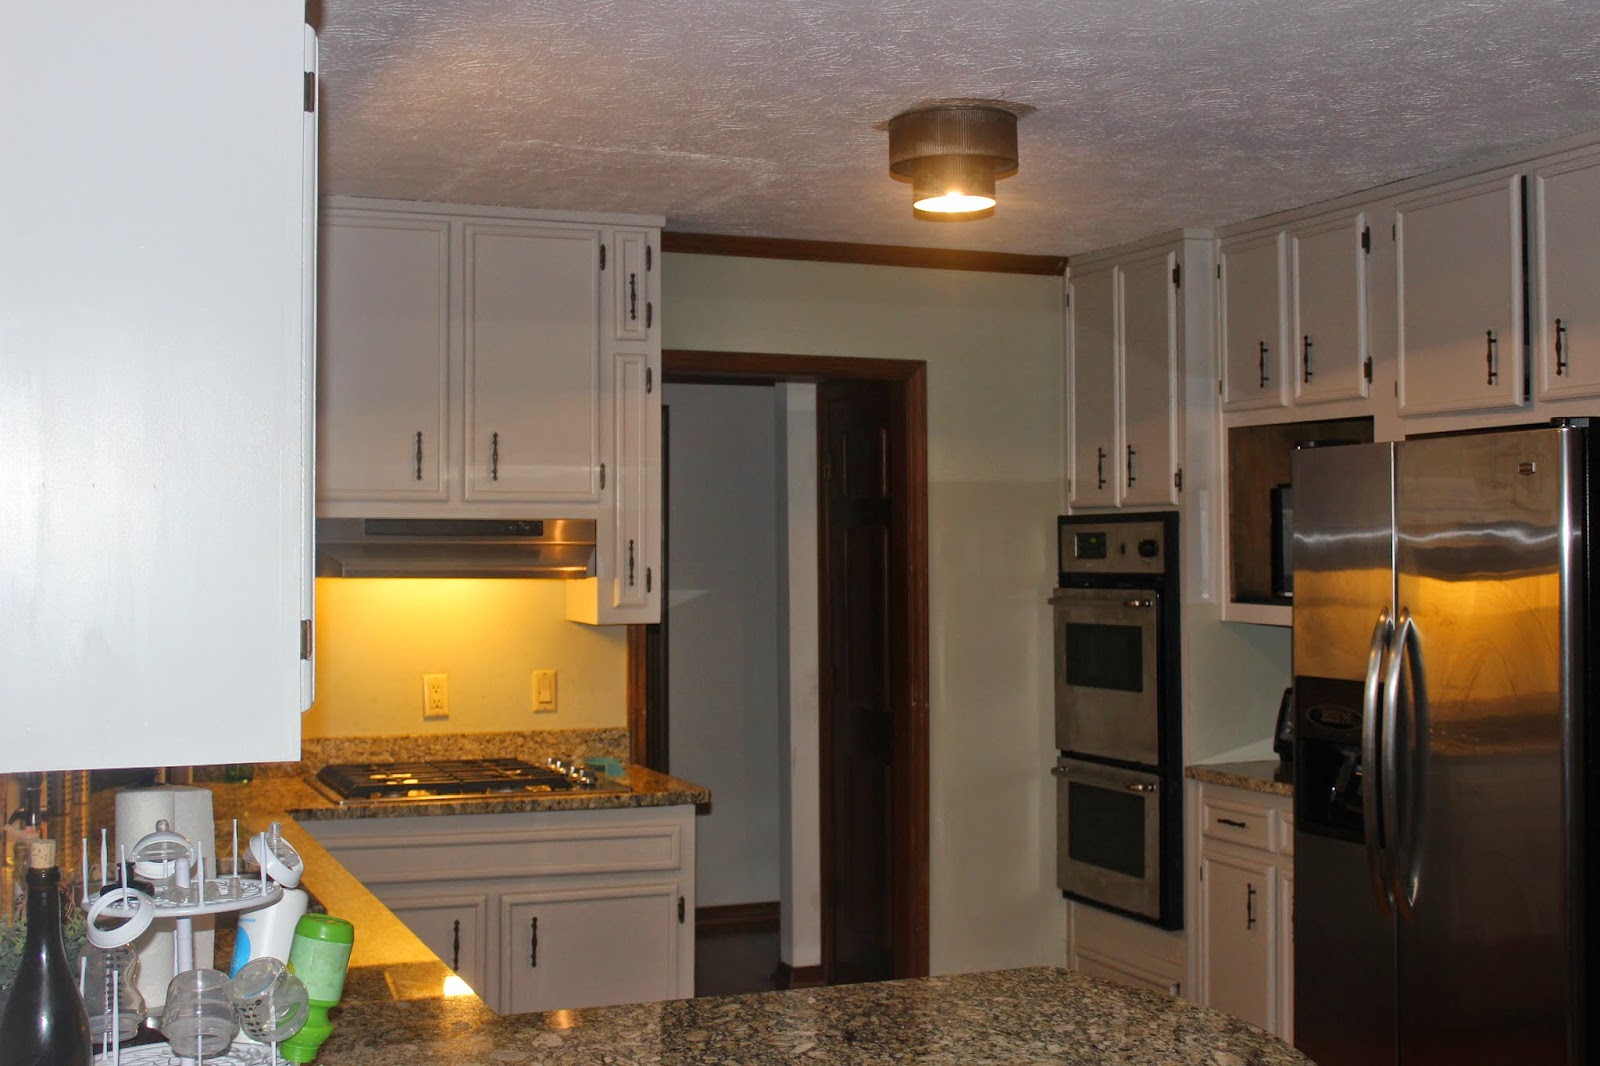
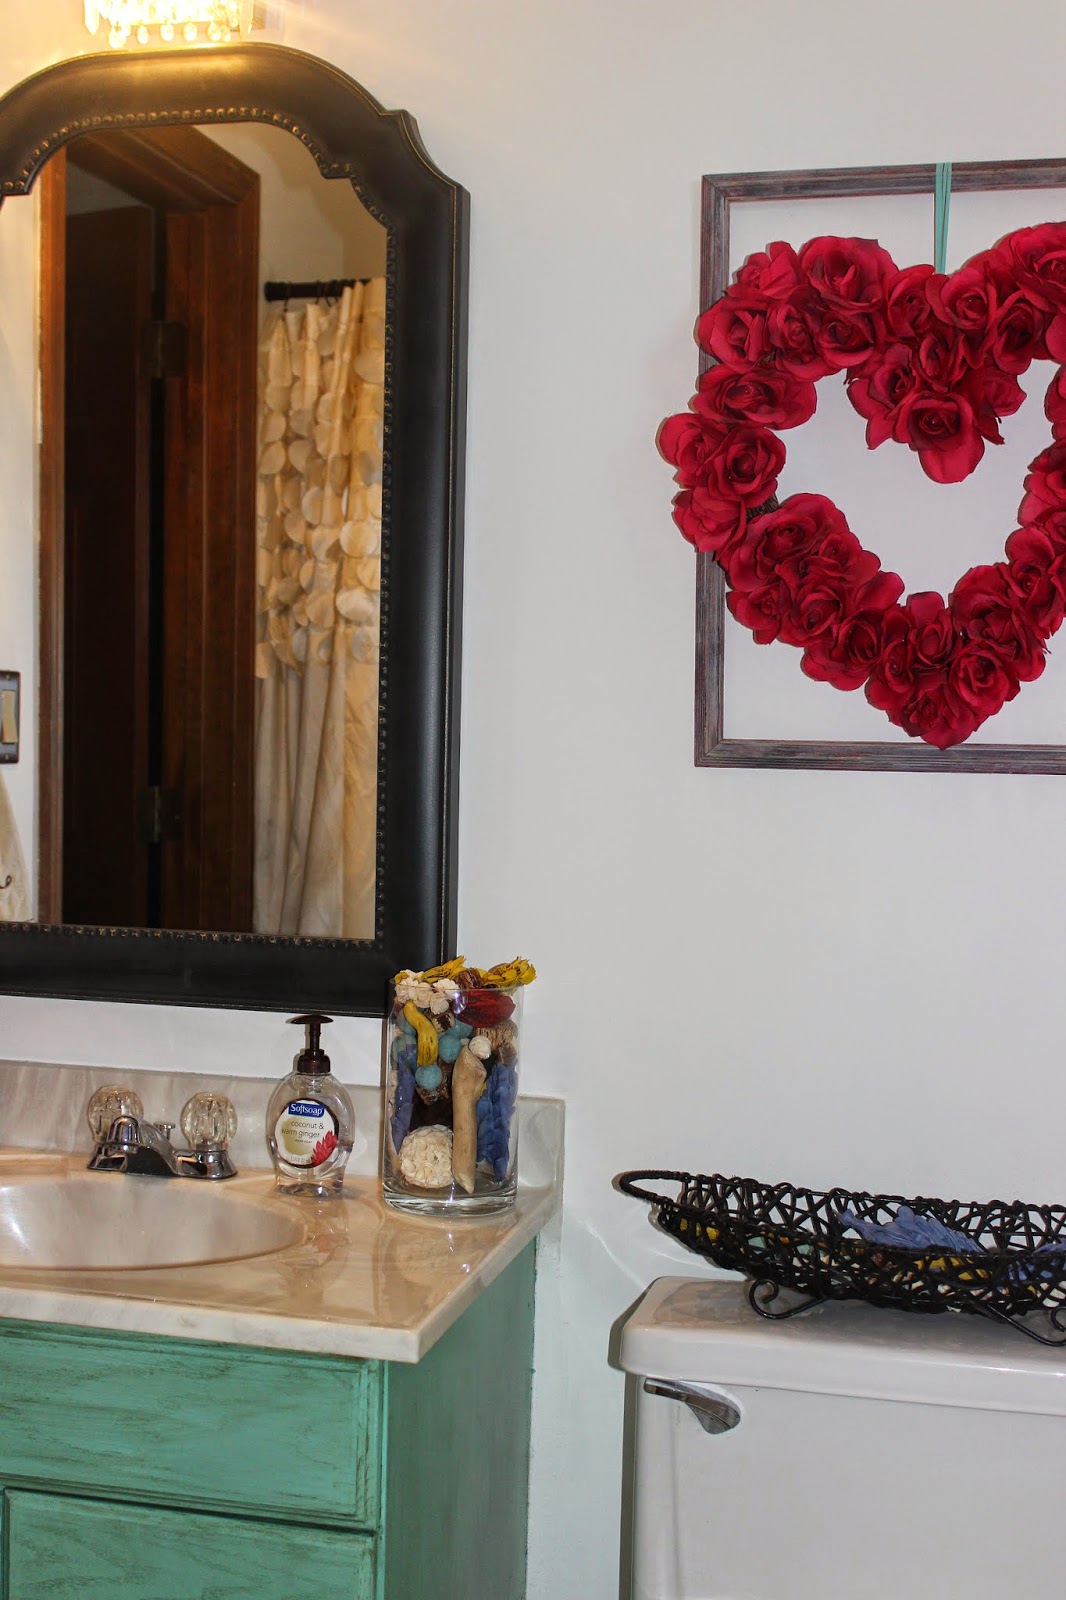
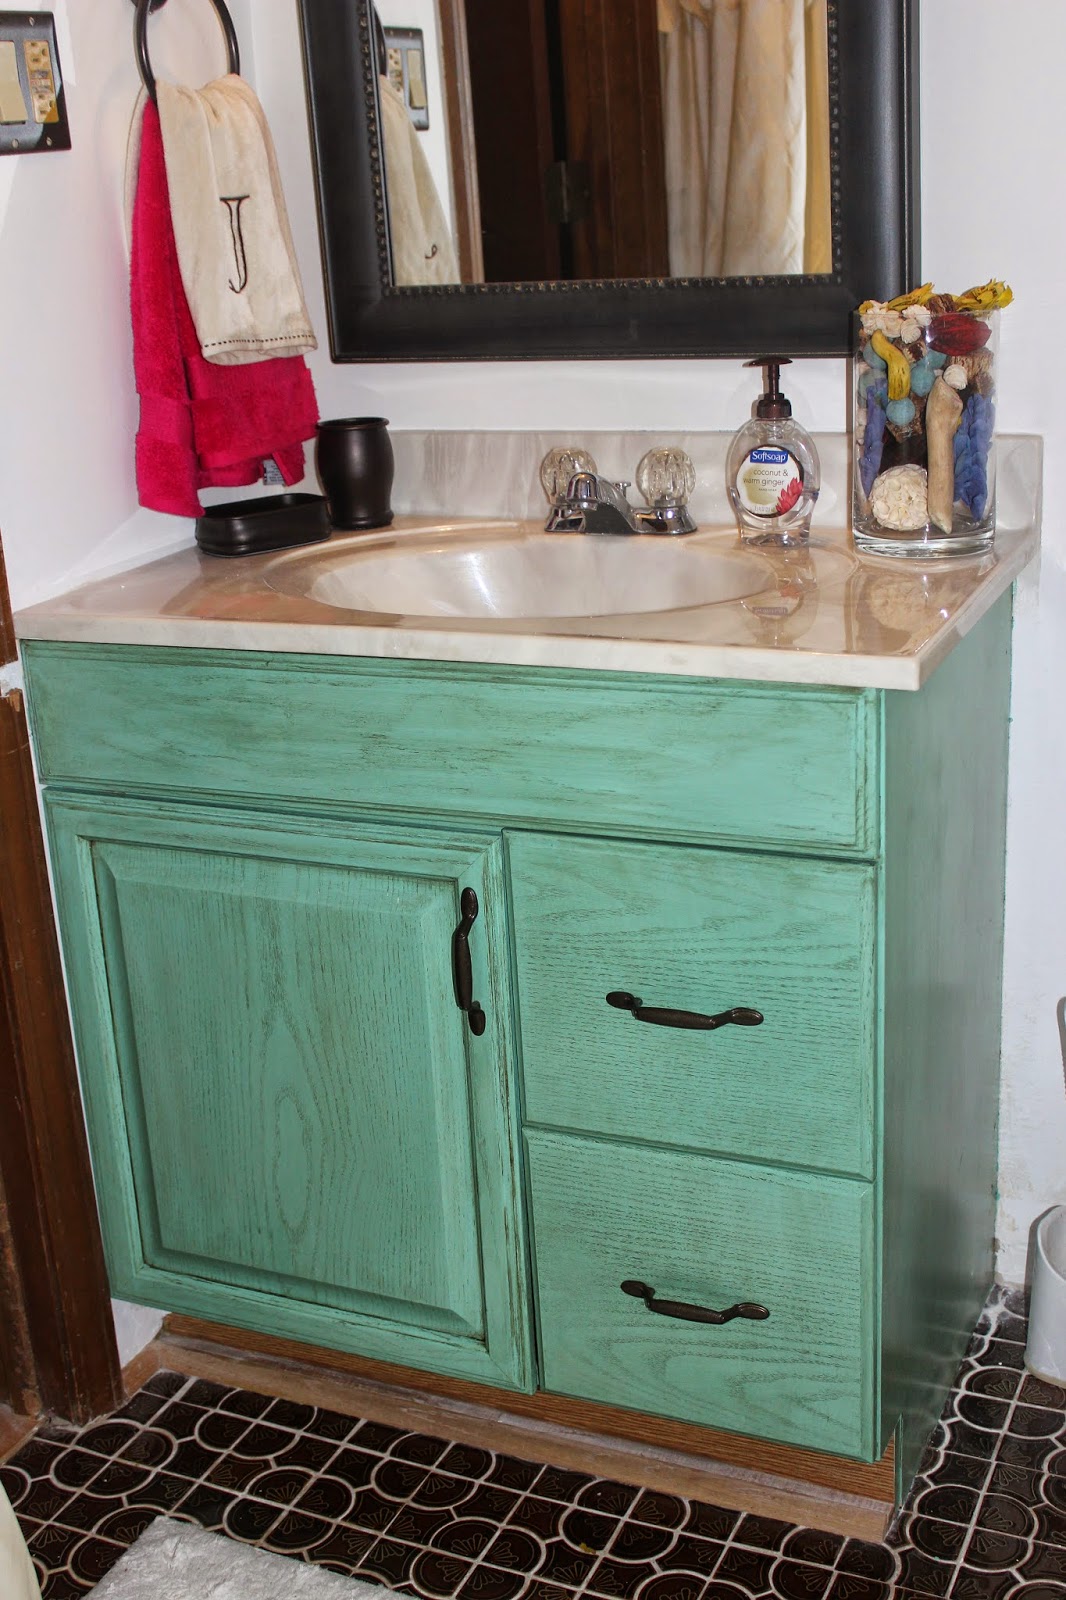
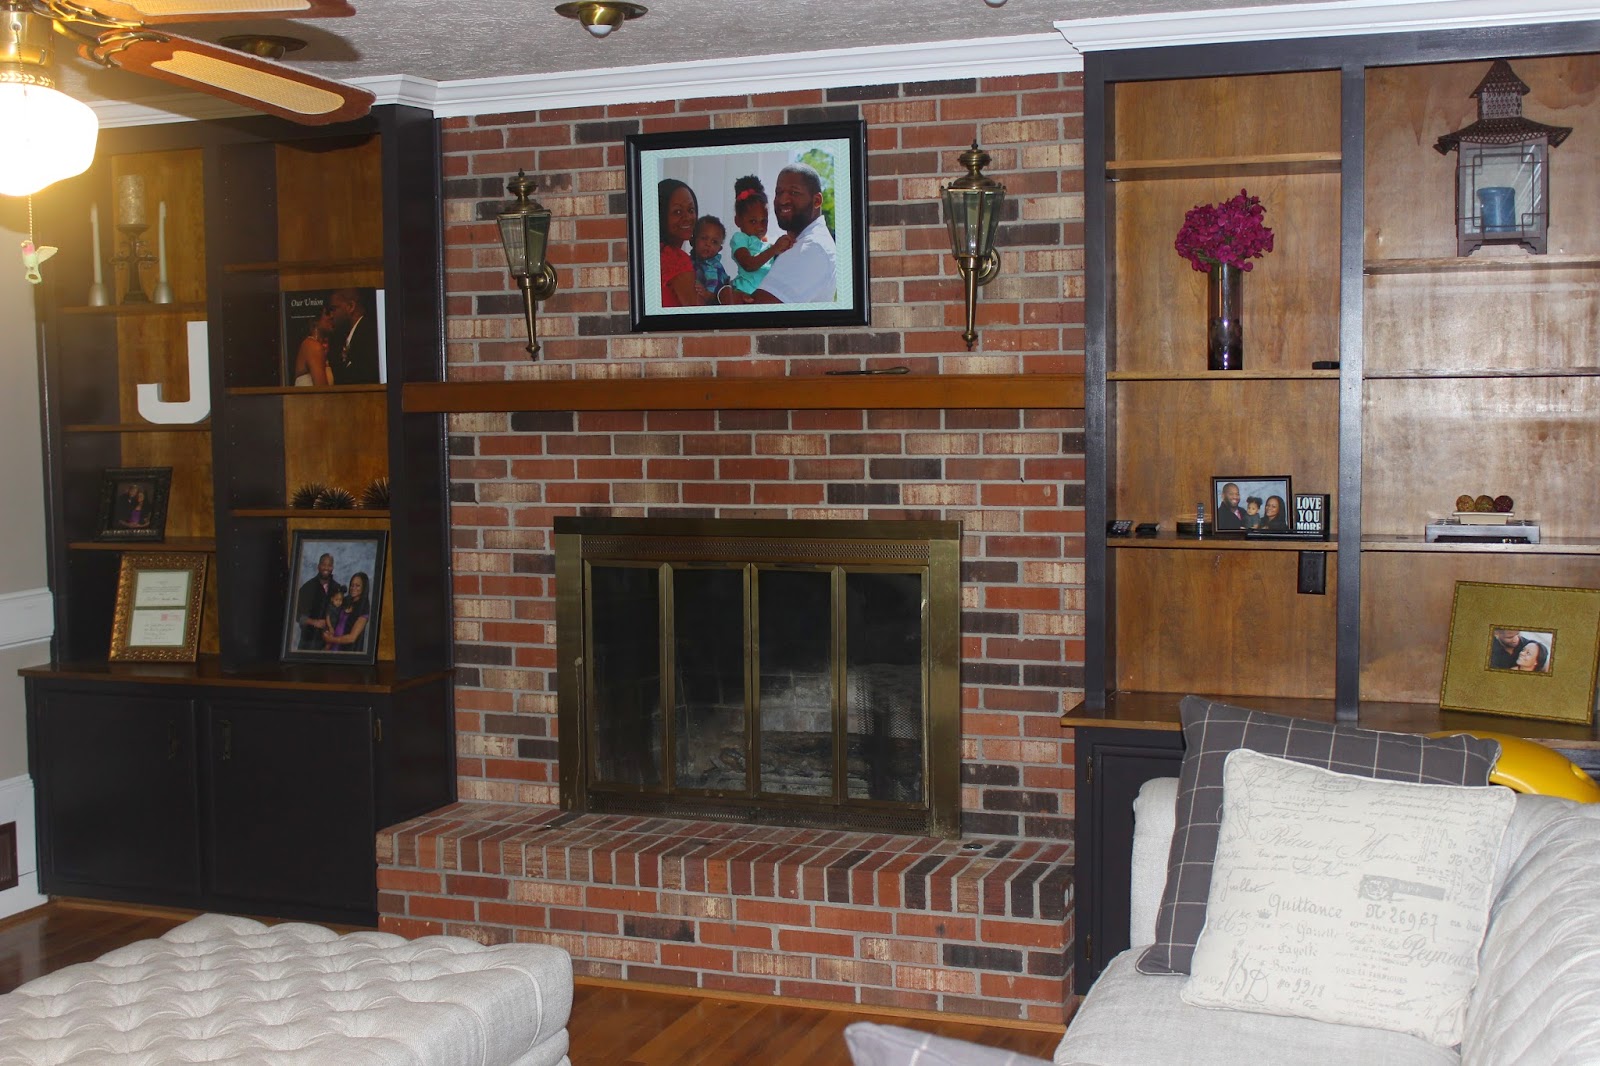
2 shades of light gray.  Abalone and Silver Fox to be exact.  There's still plenty more to do (see wish list below), but this room already seems a bit more open than it did just last week.  Painting the living room drastically changed the make up of that room, but I think emotionally seeing the results of these painted cabinets has done it for me.  I now feel like this is my home.  Not a place that I'm decorating for someone else.  The lighter colors seem to have heightened the room.  I can't wait to see what painting the rest of the wood paneling/trim will do.

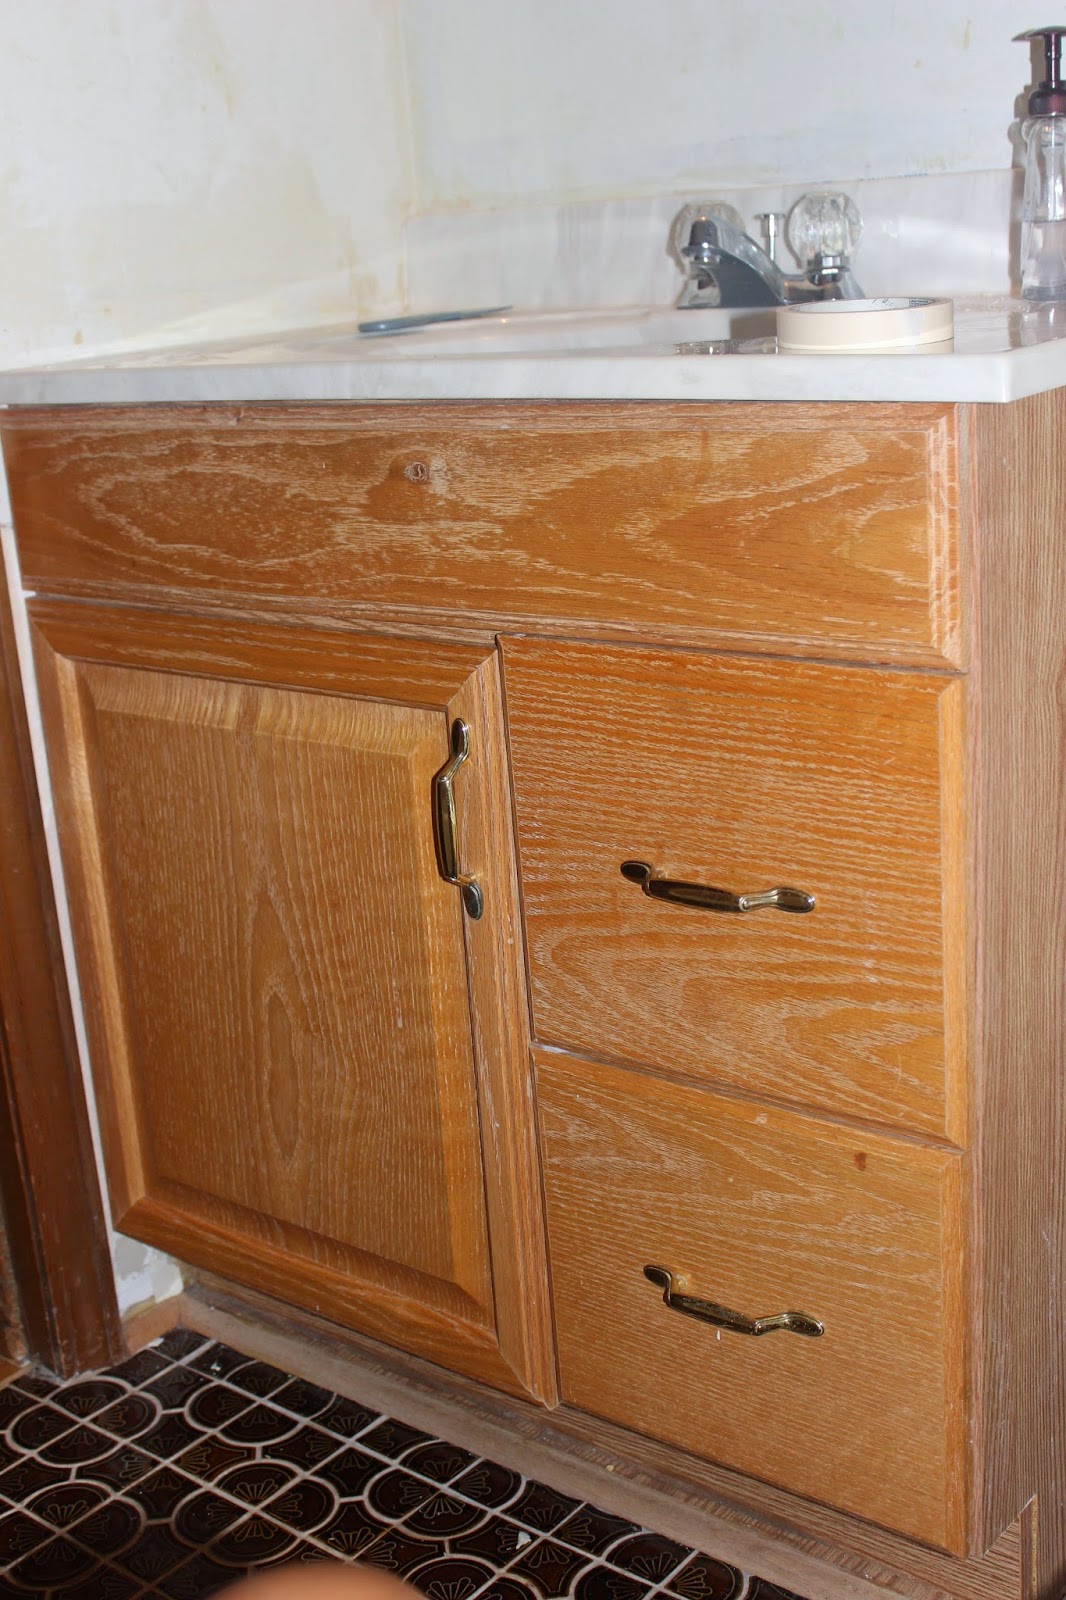
The technique for tackling this job was similar to that of the living room.  But unlike the living room, there was alot more prep work that took place before painting time.  For example, I had the pleasure of unscrewing 45 cabinet doors and handles. Yay me!

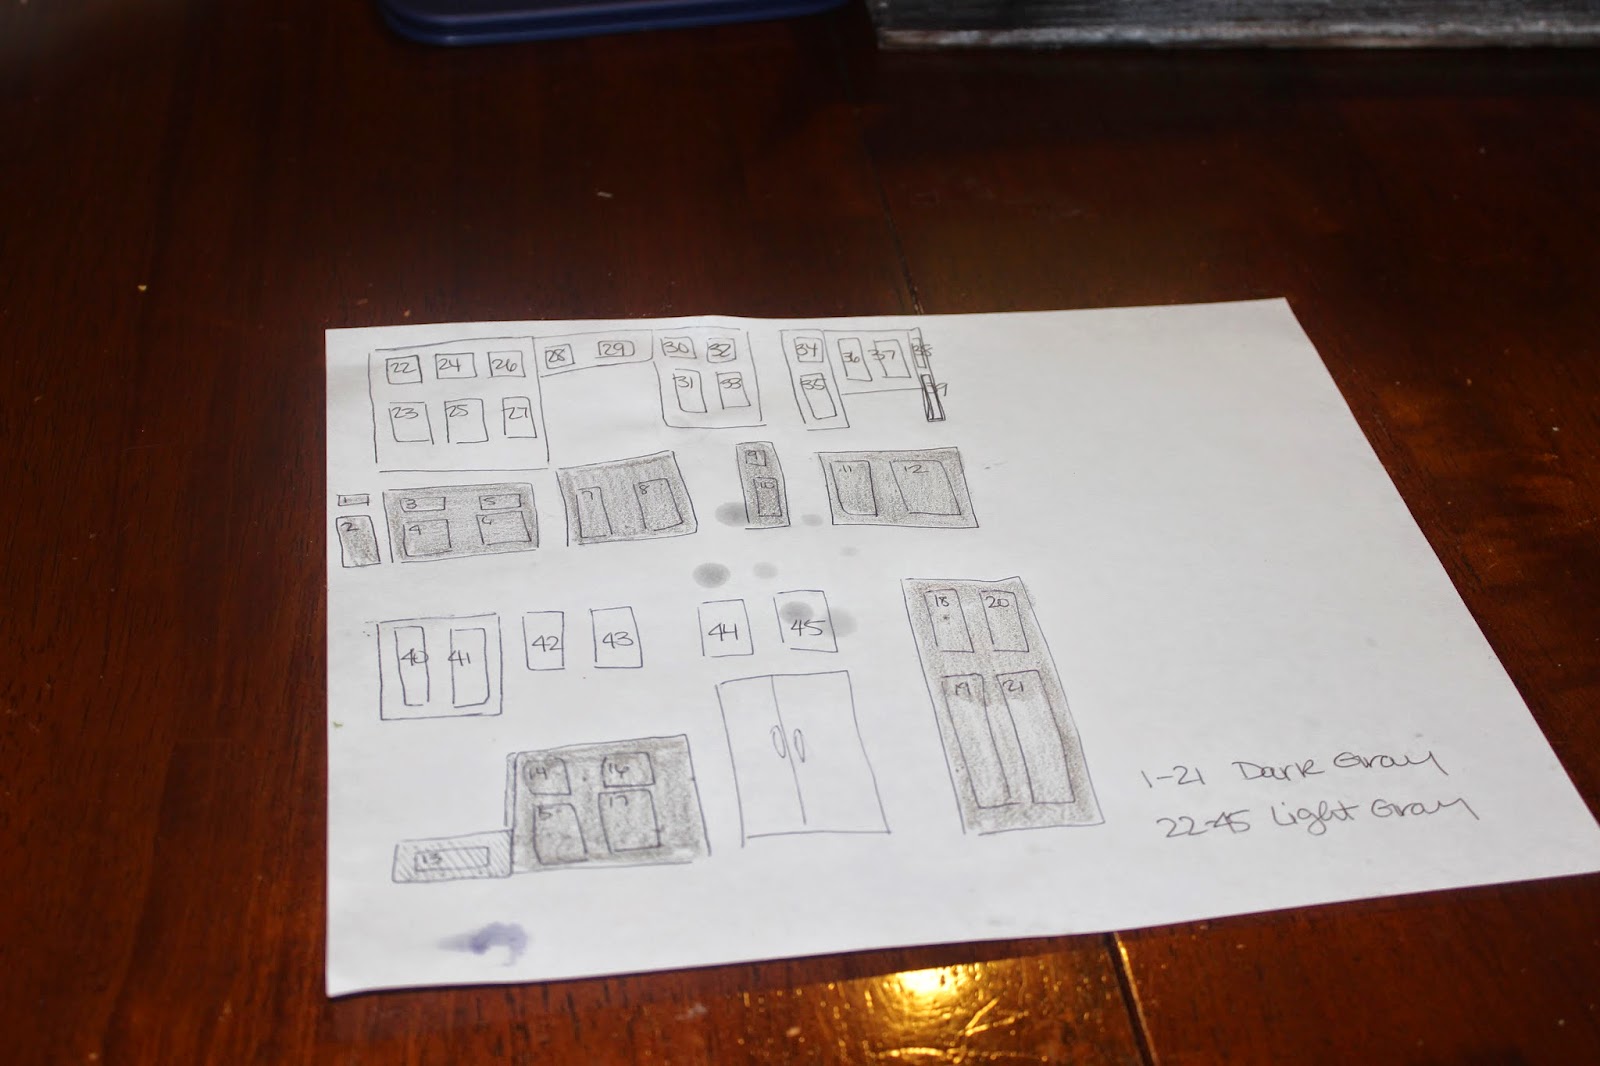
Because I decided to paint the cabs 2 different colors, I had to create two separate work stations in my basement to keep myself from accidentally painting a door the wrong color.

First, I numbered each cabinet door on paper and then, in real life, with masking tape.  He's my lovely illustration:


I was mindful enough to number all of my dark gray doors first before moving on to the light gray doors.  It's so much easier to remember that the dark gray doors are numbered 1-22 then it is to have a random set of numbers that represent all light gray doors. (I'm a working mommy - I have to cut myself some lack any way possible).

Next, it was time to take the cabinet doors down.  I unscrewed each door from the cabinet, and then, because we weren't replacing our hinges and it's extremely important that all hinges are re-attached with the same door, I only loosened the screw that attached the hinge to the door just enough to be able to rotate it so that I could paint the door without painting the hinge.  This cuts down on labeling, bagging, and anything else you'd have to do to keep each hinge with its respective door.


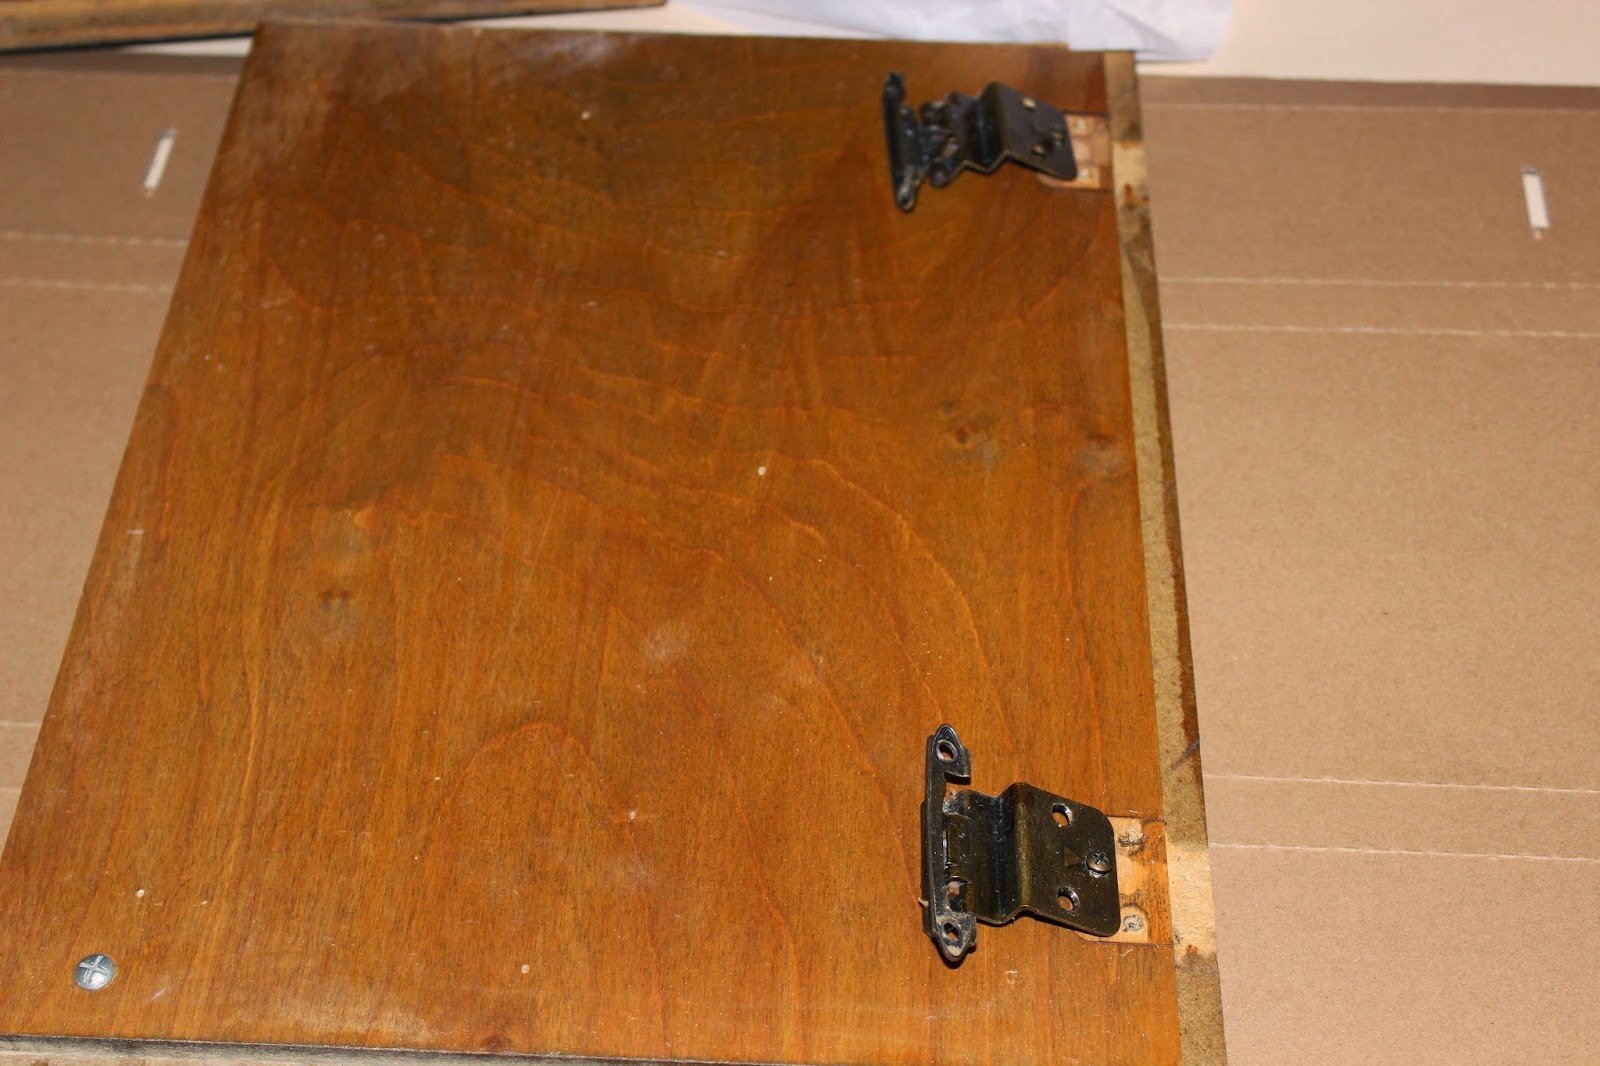
 Now, we decided to keep our existing handles (sans cover plate) and, while I'm not certain of the importance to keep the handles with their original door, I decided it would be safe to just place each handle in front of its door.  Here's what my little "workshop" looked like (ignore that the doors are already painted):


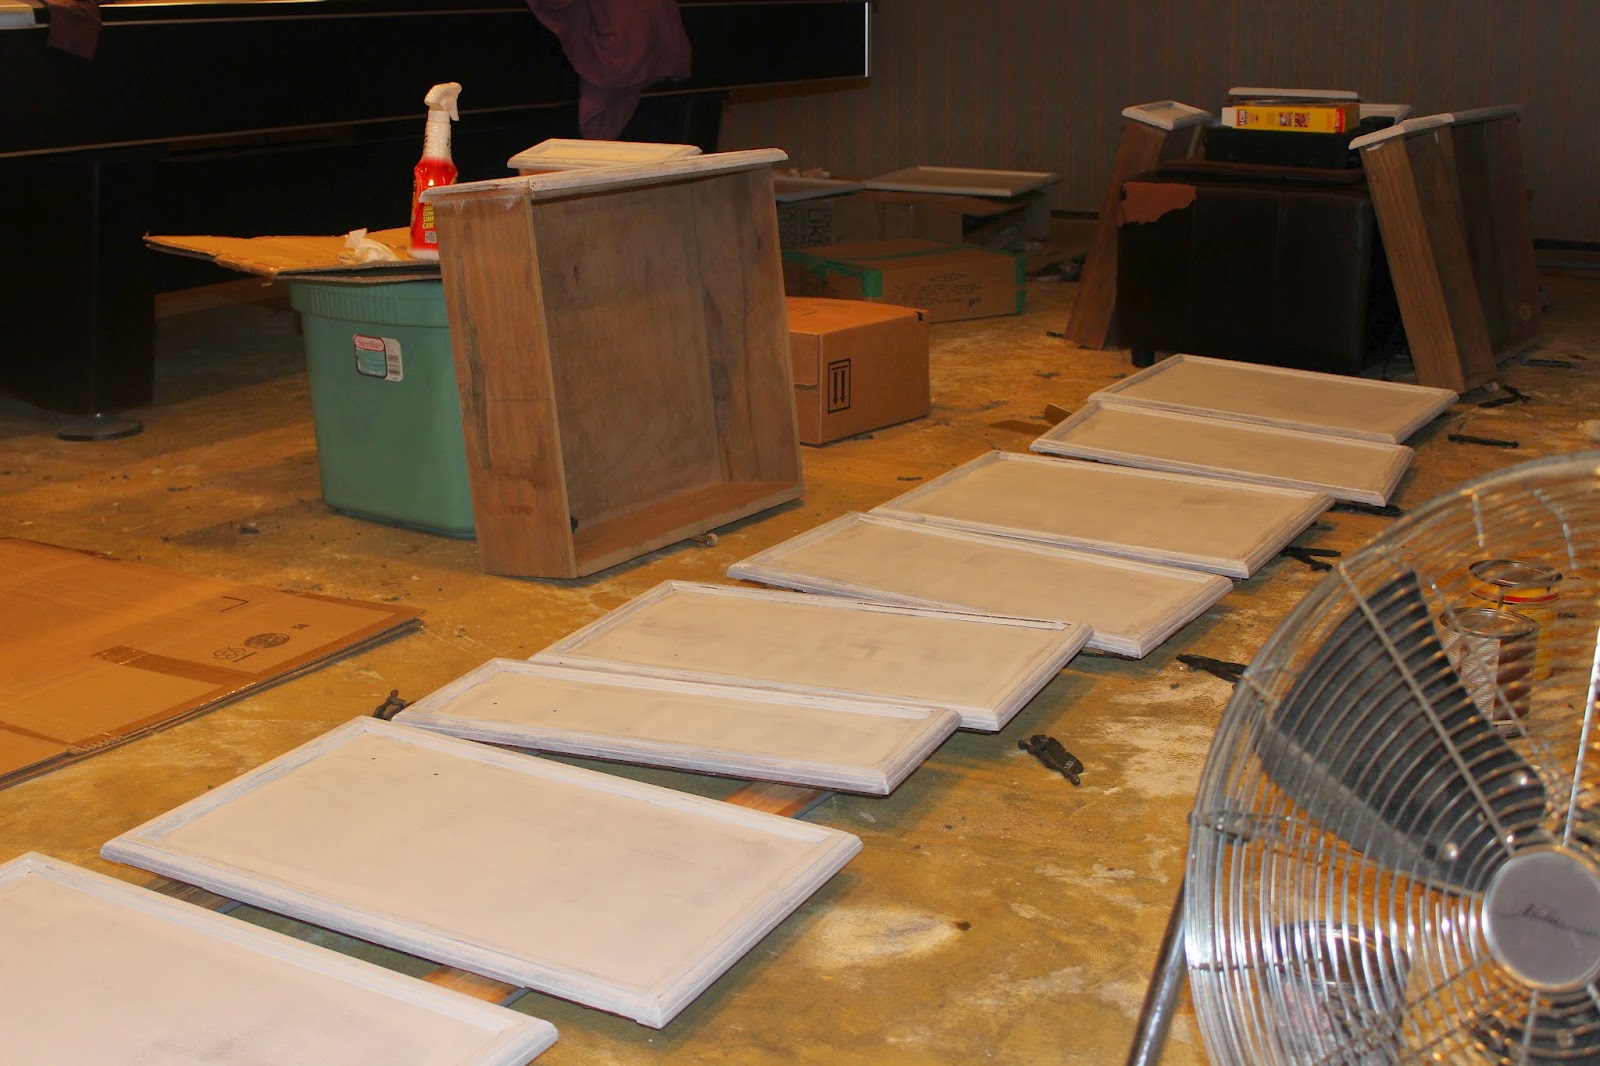
I used boxes and old canvas art to place the cabinet doors on top of.  I even used wood trim that my husband has taken off our basement walls to stain & glaze.  The proper thing to use is a workhorse...or something that is level and a bit more elevated and will allow you to paint the door edges with ease.  **Because my motto is "lofty for less", and I don't own said workhorses, I was not about to pay money for the comfort.  And as a result (of bending down constantly to prime and paint 45 cabinet doors...oh, and hauling 45 heavy cabinet doors from the kitchen to the basement...), I am sore as all get out, but no extra money was spent, and my body feels somewhat worked out.**

Once all of my doors were placed in their proper areas of my basement, I cleaned them all with Krud Krutter and began the 3 hour task of priming them (oil-based).  Fun.

Hubby and I decided not to paint the interiors of our cabinets or the door interiors, which cuts out alot of painting time as well as curing time.  We like the natural wood contrast when opening the door, but you may not so you'll need to give yourself more time to tackle this project if you decide to paint everything.

After priming, I painted on two coats of paint (which unintentionally took 4 days, #tiredworkingmomprobs).  The colors mentioned above are Benjamin Moore colors, but I had them mixed at Sherwin-Williams using their premier Pro-Classic line.  I wanted my cabinets to look as professionally painted as possible without much effort on my end, and I have to admit, this did the job.  The paint rolled (and even brushed on smoothly), had great coverage and leveling capabilities.  I cannot stress enough how much using the proper paint and tools makes any project look more professional with little leg work from you.  Oh, and speaking of tools, I used a 4" high density foam roller (this helps to deliver a smooth application) and a high quality 2" brush to get in the nooks and crannies.

Once the paint was applied, the waiting game ensued.  Four days for us, but be sure to read your paint label to determine the proper amount of wait time for you.

After time was up, we re-attached the handles and then re-installed the doors - an unexpectedly painstaking process.  Lovely!

In the coming months (depending on what sales hit, of course), we plan on doing the following:

- Painting the walls a light cream color
- Installing back splash (light cream) above the counters
- Painting the rest of the wood trim, windows, and doors (white with a touch of beige)
- "Thickening" the trim near the ceilings
- Installing an industrial looking light fixture above the kitchen
- Wood planking the ceiling...should be fun
- Installing a double barn door system to cover the laundry room and entrance to my sewing room
- Installing a new back door (I want one with more windows to hopefully make the breakfast area a sunshine-y mess)!

Stay Tuned!


Monday, November 10, 2014

That Time We Paid Off $92,000 of Debt.

It happened.  Took us 3.5 years but we can proudly say that we are debt free (with the exception of the house - but that's next on our Plan of Attack list).

Getting out of debt was quite the journey.  (Our official Debt Freedom date was September 16, 2011).  There were alot of sacrifices that we had to make along the way:

  • Our wedding and honeymoon were less than epic.  Deciding to only pay cash limited a lot of our decision making.  So,we used good quality plastic ware instead of China.  And we DIY'ed just about anything we could imagine - our centerpieces, favors, wedding programs.  I even made my dress and my bridal party's dresses.  Yup, it was that serious!  So, less than epic, yes.  But fully paid for before we said, "I do".


           Remind me to recap all of our wedding money saving tips in the near future...
  • We had to turn down alot of invites to last-minute parties, events, or get togethers.  Don't get me wrong - we had fun, but only within the parameters of our budget.  When our Entertainment money was spent for the month, that was it.  You had to give us a few weeks heads up if you really wanted us at your event.  There's nothing wrong with a little pre-planning, right?  I think this kind of discipline helps every aspect of your life (message).
  • We got made fun of by friends and family...primarily because of the sacrifices we made during our debt overhaul journey.  We got rid of cable (my grandmother still doesn't understand why we ditched it; she thinks I'm depriving my husband)!  My husband's friends would jokingly ask if he was allowed to basically "come out and play".  They would even offer to pay his way at times (which was/is totally not a problem)!
  • Did I mention we saved up for every purchase??  That mean't 1 of 2 things - either we had to prolong gratification, like waiting to go on vacations...or we had to make do with older, more seasoned items - like buying a "new to us" 7 year old car (9 years old, to date) because that was all that we could afford at the time.
  • We had to say "no" to ourselves alot.  I think you get the picture, right?
Our debt-freedom journey is the main reason for this blog.  Our taste of the "finer things" have not changed, but our wallets are in no position to fork out the dough that these things typically require.  This is a lifestyle change.  Our debt overhaul journey has helped us realize that sacrifices have to be made in order to achieve our ultimate goal.  And for us, that's financial independence (yes, house loan - that means we're coming for you)!!  We have a ways to go, but DIYing our way to our "dream home" is the key to helping us reach our goal a lot more quickly!

Here's to living Lofty 4 Less!

Tuesday, November 4, 2014

Main Level Bathroom Update.

I'm finally at a good stopping place with this room, my friends.  Check her out:


This is a very small space...hard to photograph accurately, but hopefully you get the idea.

There's still plenty more that needs to be done (which I'll list out at the end of this post), but for now, I'm out of inspiration to continue doctoring this room.  

I would like to stencil the walls, and even made a valiant attempt using a gold sharpie, but I wasn't impressed with the end result:


So, I painted over the design, hung up the mirror and called it a day.  The inspiration will hit me one day, and, when it does, I'll be ready.  Until then, guess it's time to move on to the kitchen cabinets.

But before I take off, I'd like to leave you with a few infamous before pics (mostly so I can feel good about the progress that I have made so far).


Oh, and a list of what has been completed vs. what I would like to make happen in the future (subject to change, of course):

Completed

  • Removed wallpaper
  • Primed and painted walls
  • Smoothed out ceiling
  • Removed tile border
  • New light fixture
  • New mirror
  • Painted and glazed vanity
  • Spray painted all hardware bronze (vanity handles, vent cover, and outlet cover plate)
Still To Come
  • New faucet (already ordered)
  • Wood trim to border the floor
  • Paint the door and window (an off-whitish color, maybe)
  • More potpourri or decor for the basket that's resting on the toilet

Wish List
  • Light gold stencil (trying to find something that doesn't border on making this room look too busy)
  • Add a roman shade (still going back and forth on this one.  Currently, a "half shutter" shields the outside world from viewing my guest's goods...so, installing a shade will be easier on the eyes, but may be an annoyance for one of my more modest guests to have to lower every time he/she has to use the bathroom.  Guess we'll see what happens.  Actually, who am I kidding?  This decision will fall on me finding the perfect fabric.  If said fabric is found, all logic is out the window.  The shade is getting made.  At least I'm honest).


Monday, October 27, 2014

Living Room Update.

I had every intention of working on my bathroom since my last post, but this happened:


Allow me to explain...

A couple of weeks ago, I finally made the plunge and bought paint colors for the living room and kitchen during one of Sherwin-William's 40% off sales.  And bringing the paint home made me way too anxious to not see what they looked like on my walls.  Because, this look was getting old very quickly.


(The new couches didn't magically appear with the paint, although that would be an amazing selling point.  We bought them a few months ago).

Coincidentally, it was time to slap on a coat of primer on the ceilings and walls of the guest bathroom.  So, logically, putting up a coat of primer in the living room alongside the bathroom would make perfect sense, right?  Yes, in theory, yes.  But, of course, that is not what happened or the word "bathroom" would have somehow made its way to the title.  Whathadhappenedwas...I had to use a small 6 inch foam roller in order to put on a smooth coat of primer/paint on my wood walls.  And that wasn't going to cut it for the bathroom.  Then...once I actually started painting the wood walls, I quickly realized that I had bit off more than I could chew and had to throw my poor little bathroom job to the wayside.  A project that I thought would take 3 nights max to complete ended up taking 2 weeks. Here's why:

- These walls house way too much trim, which means I was using my trusty paintbrush (read = slow motion) to get into all of the nooks and crannies (this also meant that I had to use more paint than I initially thought I'd need, which meant I had to buy one more can of paint...at full price.  Ugh!)

- I had to do alot of cutting in, because of the layout of the trim which is also very time consuming.  I liken it to painting 26 walls...26 miniature walls, mind you, but walls nonetheless.

- Painting the trim exposed all of the gaps, holes, etc... that were previously hidden when the wood was in its pre-paint stage, which meant I hubby had to smooth out these imperfections...another couple of days added to what was supposed to be a quick project.


- Lastly, I had to paint on 4 frickin' coats of primer/paint to completely cover the wood trim!

That being said, I am kind of glad that I started this project not knowing what I was getting myself into.  Else, I would have sat on this project for a few more weeks, months even, until I opened up enough time on my calendar to tackle it.  Ignorance is bliss has proven itself to be productive...at least in this situation.

Here's a quick run down of the selection/prime/paint/caulk process:

First, we had to select paint colors.  Several months ago, I picked up Benjamin Moore and Sherwin-Williams paint samples.  For the wall, we wanted a champagne-looking color, similar to our window treatments.  For the built ins, we wanted a color that matched our TV stand.  I taped a collection of potential contenders to the wall next to our window treatment:


And stuck the built-in swatches right on the TV stand door:


It was quite easy to pick the color for the built ins.  We went with Benjamin Moore's Deep Caviar (Duration brand, semi-gloss):


The built-ins sit a few feet away from the TV stand which makes it way more forgiving to not select a perfect match.  I think we were pretty spot on though:


The walls were not so easy, which is why this project had been brushed off for so long.  Taping the samples on the wall didn't seem to help.  I would walk into the room at different times of the day and take the "losers" off the wall only to find that the last sample standing was too dark (per hubby's standards).  So I took another approach.  I knew that I wanted the walls to coordinate with my champagne window treatments, so I looked for khaki-ish colors that had more of a gold undertone.  That made the selection process alot easier, because it helped me eliminate colors that appeared champagne but were derived from other colors.  For example, alot of my finalists were mixed with olive.  The color itself was beautiful and champagne-like, but I knew that once I got it up on the wall, what I perceived to be khaki would appear a bit olive-y at certain parts of the day, which is not a part of my desired color scheme.

Hubby and I finally decided to go with Sherwin-William's Bleeker Beige (Cashmere brand...the sales associate actually talked me into buying this paint b/c of its smooth application.  She was right.  This paint rolled on like butta').  And we chose to do the trim in Sherwin-William's Creamy (Duration brand, semi-gloss...although in hind sight, I would have gone with one of their premium products to possibly prevent having to slab on so many coats of paint).

Second, taping off wall/window edges and cleaning the walls.  Taping is self-explanatory.  Depending on the surface you're getting ready to paint, you may or may not have to clean the walls.  I noticed a few splotches of dust in hard to reach areas, so I did a quick wipe down using Krud Kutter.

Next up, primer.  We used an oil based primer here.


Oil based primers pack some serious fumes, but they get the job done in one coat.  To reduce my kiddos' exposure to the fumes, I painted this coat on right after they were tucked away in their beds (with their doors closed...their rooms are on a different floor).  By morning, the smell was very faint.

Lastly, it's time to paint the walls and trim.  I actually painted a coat on the walls first not knowing that it would be more difficult to cut in on the trim.  So, I quickly adjusted my plan of action.  I proceeded to paint on three coats of paint on the trim, and then moved on to painting on the second coat of wall paint (Hubby inserted caulk where ever necessary in between coats 1 and 2 of the wall trim).  


So, there you have it folks.  A nicely updated living room that has lost much of its old-schoolish vibe.  Welcome to 2014, my previously antiquated little room.  At some point, we're going to have to address the fireplace (I'm thinking mortar white-wash).  Ooh, and then decorating the mantle, walls, built-ins...and stenciling the back wall of the built-ins.  But none of that is going to happen until I paint the bathroom...and kitchen cabinets.  Okay, none of that is probably going to happen until I paint the bathroom and kitchen cabinets.  You already know how I get down.  I'm all over the place.


Wednesday, September 24, 2014

DIY Garden Flag

So, even though we have a gajillion projects to do indoors (that's about two score more than a gazillion for the numbers people out there), it was important (to me) that I create a "garden" flag to let the neighborhood know that "we're here...and we ain't goin' nowhere any time soon."  So, off to the fabric store I went...

This project has actually been in the works for a little over a month.  It turns out, it wasn't as simple to pick out fabric for this flag as I originally thought (I've also been experiencing the same self-imposed pressure with picking out paint colors as of late).  I don't want to misrepresent my family by selecting the wrong fabric color, texture, you get the picture...  And I wanted this flag to be sophisticated and not too girly to appease the old hubs of mine.  Well, let me clarify...sophistication is the end goal for this flag alone, what I'm dubbing my "starter" flag - the flag that will set the tone of our existence on our quiet street for years months to come.  After several trips to the fabric store, I finally landed on burlap - a nice, natural brown for the background and a brown/black herringbone design for the monogram.  I also picked up some outdoor scotch guard to make sure my flag stands the test of time.

Oh, before we continue, here's a Lofty 4 Less tip:  most fabric stores will cut fabric, notions, etc... for you by the inch.  You can save a few duckets by asking for the exact amount of material that you need.  This does not apply to online fabric stores at the moment; I typically only buy home decor fabrics online and order to the closest half yard (whenever possible).  When I'm making window treatments, I use the fabric in excess of what I really needed to beef up/thicken my hems,but more on that later.

Ok, design mode.  I let my family give their input here.  To make things fun, I printed out a number of "J"s and let my family "carefully" rule out font by font until a winner was selected.  I use the term carefully loosely because half of my family members are currently under the age of 3!  In fact, I was unable to photograph the selection process because my son wrecked my display (I'm actually numb to this now).  Either way, here's a neat and in tact version of their options:

With some slight coaxing by yours truly, they (my husband, really) ended up selecting the 4th "J".  It was the most unique, and I thought it would add interest to a somewhat "safe" color/fabric/texture selection.

To determine the proper measurements for my flag, I started by measuring the width of my flag pole (actually, I sent my husband out to measure it for me while I watched the kiddos).  10.5 inches.  So...I would make my flag 10 inches wide so that it would fit snugly on the pole.  (See how I did that?  No quick rule of thumb, just a gut measurement (ok, a gut measurement along with 20+ years of sewing experience)...and for your sake, if it turns out that your flag is too wide for your liking, you can always take it in...always better to have the option to take something in).  I decided to make the length of my flag 12 inches.  Here's a quick sketch that kinda/sort of explains how I came to this number:

Followed by a somewhat brief explanation:  I knew that I wanted my lettering to span a width of 6 inches simply because I liked the size when I printed out the J's for my family to review.  A 6-inch wide J allows for a 2 inch margin on both sides of the flag.  The length of my J is 8 inches (which I also liked), so in order to have a 2 inch margin on top and bottom of the flag, the length of the finished flag would have to be 12 inches.  You'll also need to factor in enough fabric to sew your seams (I typically add half an inch), which means that I needed to cut out 11 by 13 inch rectangles for my flag base (2 rectangles to be exact - one for the front of the flag, the other for the back to hide my stitchings).  Still following me?  I really hope so.

Ok, so next step was to pin and cut out my monogram...

Followed by eyeballing the placement of the J on the flag and pinning it.  I actually tried to get technical and initially used a measuring board to help with placement, but I wasn't pleased with the result.

Finally, sewing time.  I used a simple zigzag stitch.  My sewing machine has an applique stitch, but I opted to zig zag because it would help prevent the burlap from fraying.  (I even thought about modge podging my J onto the flag but didn't know how my sewing machine would react to it.  And I'm not too confident about using modge podge on outdoorsy projects; I have a few discolored decoupaged flower pots to back me up...yep, Pinterest fail).  I went around my J twice with the zigzag stitch just to make sure the entire circumference of my applique was secure.


Next up, was adding loops to hang my flag.  Originally, I wanted to use the natural burlap to create my loops but a little bit of last minute creativity and a lot of laziness helped me to decide on making herringbone loops instead (I didn't have to change my thread color if I went with the herringbone.  For shame!)  As for the loop measurements - it all comes down to preference.  I decided that I wanted three equally spaced loops so I cut out a 4x10 inch rectangle.  Using a zigzag stitch, I hemmed both sides 1/2 inch (lengthwise).

I cut my hemmed rectangle into three equal pieces and pinned and sewed them to the top of my flag.


Once my loops were intact, I sewed the front and the back portion of the flag together (right sides facing each other), leaving a gap at the bottom of the flag so that I could turn it inside out.

To make sure that your corners are professional-looking, cut your raw edges at a diagonal angle as pictured above.  This will reduce the amount of fabric that lives in each corner once it's turned inside out, therefore making your corners look more crisp and clean.

Small stitch at the bottom of the flag to close the gap up.  Light pressing, and wallah!!  We have ourselves a permanent beautiful statement of our existence on this street!


I scotch guarded the flag while it was on the post.  No sense in getting all fancy and trying to create a formal spraying station, right?  And if this doesn't hold up, no sweat off my back.  It's gon' be what it's gon' be, right?  Besides, I have plenty of scrap material to make many more.  Don't test me, Weather.

Friday, September 19, 2014

Main Level Bathroom

For the past week or so, I have been plugging away at giving my "guest" bathroom new life.  There's nothing wrong with it functionally (other than a leaky shower faucet), but it has been crying out for, uh, brightness.

See what I mean.


Ah, yes.  Faux plastered wallpaper and textured ceilings. Heavenly.

First to go was the wallpaper.  I, surprisingly, didn't have a problem stripping it.  The top layer peeled off quite easily with muscle. 

I resorted to a "non-toxic" spray to remove the 2nd layer.  I only had to wait a few minutes for the glue to dissolve.  I then used a plastic scraper to remove it from the walls.
             

This bathroom sported a lovely tile trim (same color as the tub wall tile) that clearly had to go.  (I will hide the wall tile with a shower curtain).  I used a crow bar with a chiseled edge and a hammer to remove the tile.  Somehow, my efforts got a bit out of hand and this happened.


Oops.

Not to worry.  I've got a fix for that. Haha!

Soo...once all of the wallpaper has been removed, the proper thing to do is to wash the walls with a water/vinegar mix to remove all of the lingering glue.  And I'm only mentioning the proper thing to do b/c I failed to do it.  Instead, I whipped out the electric sander.  And this may be the appropriate time to make a confession...

 I don't have a lot of patience.  In life and in DIY.  Mind you, I'm getting better (child-rearing has done wonders for me.  My kids don't care what kind of timeline I'm on...and so, I've learned to chill out and take my time when dealing with them.  Same goes with what ever project I'm tackling).  Generally speaking, I am a rule follower.  Except when I'm not a rule follower.  Yafeelme?  I'm not sure what my thought process was at this particular moment.  To only sand down the textured ceiling as much as possible?  Perhaps.  Either way, the sander made it to the walls and I just kept on going.

My trusty sander works well with removing leftover glue and wallpaper, by the way.  Oh, and I should mention that I had to sand the ceilings because spraying them with water to scrape them didn't work. Ugh.  It was a, uh, dusty job.

Those are real floor tiles, by the way.  I am in great like with them (I love God, my husband, and my kids).  Oh, and you might be able to tell from this shot that I painted the vanity.  I ran out of wallpaper remover earlier this week and didn't want to break momentum on the progress of this bathroom.  More on the vanity at a later date.  Mainly, because I'm just not done with it.

Soo, after sanding, I started filling in my tile removal goof up with joint compound.  Tah Dah!


And skim coating the ceilings.  Ugh.


These are only my first passes at smoothing out my walls and ceiling (I ran out of compound, haha)!  I imagine I have at least two more passes to get through.  I am, surprisingly, exercising great patience with skim coating.  I used this tutorial to understand the basic rules of skim coating but have since adapted my own technique and tend to load up a little more mixture onto my scraper than probably recommended.  You know, just to keep things moving along more quickly.  Otherwise, this would take forever!  Rule follower, except when I'm not.  It's who I am.  So back to my surprising bout of patience...I figure at any point I can stop skim coating the ceiling, and it will still look ten times better than it originally did.  What ever keeps me going, right?

I still have a ways to go.  A couple more rounds of skim coating, followed by sanding, priming and painting.  Seems so easy when you can sum it all up in one sentence.  Sigh.

More details to come, but right now I have 42 pounds of compound in my car that I need to transport into the house.